
How to Apply Cream Blush for a Natural Look
Table of Contents
- What You'll Need Before You Start
- Cream Blush vs Powder Blush: Which Works Best for You
- Step-by-Step: How to Apply Cream Blush for a Natural Look
- How to Blend Cream Blush for a Flawless Finish
- Best Cream Blush for Natural Look: Finding Your Perfect Shade
- Skin-Type Application: Adjusting Your Technique
- Common Mistakes to Avoid
- Frequently Asked Questions
Last Updated: September 25, 2026
What You'll Need Before You Start
Getting the right tools and products makes the difference between a blotchy application and a flawless finish. Before you start applying cream blush for a natural look, gather a few essentials.
You'll want a cream blush product. The formula matters because it blends differently than powder. Look for something with a smooth, emollient texture that won't tug on your skin or pill under your foundation.
A few application tools help too. You can use your fingertips, which offer the most control and warmth. A beauty sponge works well for stippling the product into skin. A synthetic brush gives you precision, especially if you prefer a more diffused application.
Foundation or primer goes down first. This gives your cream blush something to grip so it doesn't slide around. Setting powder helps lock everything in place once you're done blending.
At sheshedbeauty4U, we recommend starting with quality basics. The American Academy of Dermatology suggests that proper skin preparation is key to any makeup application, including blush. Our Radiant Beauty Essentials collection includes tools and products designed to work together for seamless results.
Cream Blush vs Powder Blush: Which Works Best for You
The choice between cream and powder blush depends on your skin type and the finish you want. Understanding the difference helps you pick the right format for a natural look.
Cream blush sits on top of your foundation and blends into it. The texture is smooth and pigmented. It creates a dewy, flushed finish that looks like color coming from within your skin. Cream formulas work especially well if you have dry or mature skin because they don't emphasize texture or fine lines.
Powder blush is pressed and applied with a brush. It sits on the surface and creates a matte or satin finish. Powder works better on oily or combination skin because it won't slide or separate throughout the day.
For a natural look, cream blush has a real advantage. The buildable pigmentation lets you start light and add more if needed. You control the intensity easily with your fingertip. Powder requires a brush and more precision to avoid harsh lines.
Skin type matters here. If your skin is oily or prone to breakouts, powder gives you more staying power. If your skin is dry or you want a radiant, moisturized appearance, cream is the better choice. Combination skin can go either way depending on where you apply it.
The sheshedbeauty4U Radiant Beauty Essentials include both formats so you can experiment. Our Powder Blush comes in shades like Barely Mauve and Peach Daiquiri for those who prefer a traditional powder formula. For cream blush lovers, products like the GET IT CHICA All-In-One Face Palette include a blush shade called CONQUER, a radiant sun-kissed glow with warm orange undertones.

Step-by-Step: How to Apply Cream Blush for a Natural Look
Applying cream blush for a natural look is straightforward once you know the steps. The key is using the right amount and blending properly so the color looks like it's coming from your skin, not sitting on top of it.
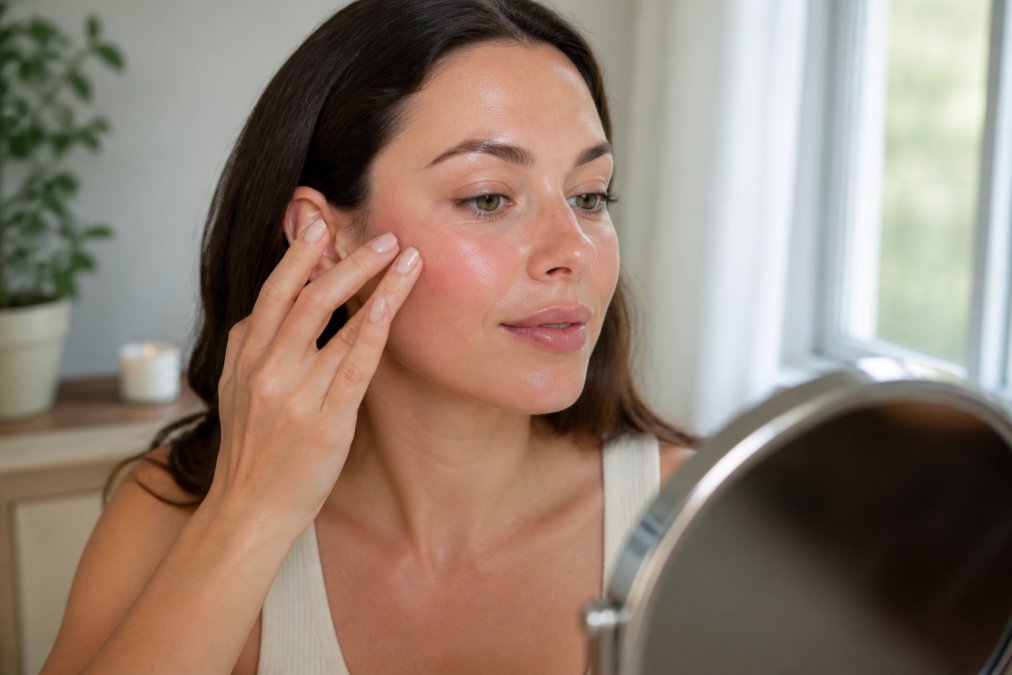
Step 1: Prep Your Skin
Start with a clean, moisturized face. Apply your regular skincare routine and let it set for a minute. This prevents the cream blush from moving around or pilling once you apply it.
Next, apply foundation or a tinted moisturizer. The cream blush needs a base to grip. Without it, the product will slide and won't blend smoothly. Let your foundation dry completely before moving to the next step.
If your skin is very oily, use a mattifying primer. If your skin is dry, use a hydrating primer. Either way, primer creates an even surface for blending.
Step 2: Choose Your Placement
Where you place cream blush changes the entire look. Placement determines whether you get a natural flush or an obvious stripe of color.
Find the apples of your cheeks. Smile and feel where your cheeks puff out. This is where most of your color should go. Start here for a natural, youthful flush.
Consider your face shape too. If you want a face-lifting effect, place color slightly higher and toward the temples. This draws the eye upward. For a softer, rounder appearance, keep color on the apples and blend downward.
Undertone matters for placement choices. Warm undertones look best with peachy or coral shades placed on the apples. Cool undertones suit pink or berry shades placed slightly higher on the cheekbones.
Step 3: Apply with the Right Amount
Use less product than you think you need. Cream blush is pigmented. A small amount goes a long way. Start with a tiny dot about the size of a lentil on your fingertip.
Tap the product onto the apples of your cheeks. Don't swipe or drag. Tapping deposits color without creating harsh lines. If you're using a brush, use a stippling motion instead of sweeping.
Build color gradually. Add more product if you need it. It's easier to add than to remove. This approach prevents the patchy, overdone look that happens when you apply too much at once.
Step 4: Blend for a Seamless Finish
Blending is what makes cream blush look natural. Without proper blending, you get a stripe of color that doesn't look like a real flush.
Use your fingertip or a damp beauty sponge to blend. Press gently and move the color outward from the apples of your cheeks. Blend upward toward the temples and downward toward your jawline. The color should fade gradually with no hard edges.
Keep blending until the edges are soft. The color should look like a natural warmth on your skin, not a defined circle of pigment. This takes 20-30 seconds per cheek.
If you over-blend and lose all the color, add another small amount and blend again. Building in layers looks more natural than applying one thick layer.
How to Blend Cream Blush for a Flawless Finish
Blending separates a natural look from an obvious makeup application. The technique matters as much as the product itself.
The stippling motion works best for cream blush. Use your fingertip or a beauty sponge and press the product into your skin using small, bouncing motions. This blends the edges without dragging the color around.
For a seamless finish, blend in the direction of your skin's texture. Most people's skin has a natural direction the hair grows. Blending with this direction creates a more natural appearance than blending against it.
Avoid harsh edges at all costs. These signal that you're wearing makeup. Feather the color outward from the center of the apples of your cheeks. Let it fade gradually into your foundation.
If the color looks too intense after blending, use a clean, damp beauty sponge to sheer it out further. Tap gently over the blush area. This reduces pigmentation without removing all the color.
The goal is radiance, not definition. Your cheeks should look flushed, like you just came in from a walk. The color should have no visible edges and blend completely into your complexion.
Best Cream Blush for Natural Look: Finding Your Perfect Shade
Choosing the right shade makes a huge difference in how natural your blush looks. The best shade for you depends on your skin tone and undertone.
Fair skin looks best with soft pinks, light peaches, and cool rose tones. These shades create a natural flush without looking harsh. Barely Mauve from sheshedbeauty4U's Powder Blush collection is a sheer cotton candy pink that works beautifully on fair complexions for a soft, natural glow.

Medium skin has more flexibility. Warm peaches, coral, and deeper pinks all work well.
Skin-Type Application: Adjusting Your Technique
Your skin type affects how cream blush applies and wears. Adjusting your technique for your specific skin ensures the best results.
Common Mistakes to Avoid
Understanding what goes wrong helps you apply cream blush for a natural look successfully.
Frequently Asked Questions
What's the best way to apply cream blush for a natural finish?
Start by dotting a small amount on the apples of your cheeks, then blend outward and upward toward your temples using your fingertips or a damp beauty sponge. Use light pressure and build the color gradually, it's easier to add more than to remove excess. Focus on creating a seamless transition so the blush melts into your skin rather than sitting on top. A natural look comes from blending thoroughly and using less product than you think you need.
How do I prevent cream blush from looking patchy?
Patchiness happens when you apply too much product in one spot or don't blend enough. Use a light hand and blend immediately after application. If your skin is dry, moisturize well before applying cream blush, hydrated skin accepts color more evenly. For oily skin, use a primer to create a smooth base. A damp beauty sponge works better than fingers for blending if you're struggling with uneven coverage.
Should I apply cream blush before or after setting powder?
Apply cream blush after your foundation but before setting powder. This allows the cream formula to blend seamlessly with your base. Once you've blended your cream blush, you can lightly dust setting powder over it to lock everything in place. If you apply powder first, cream blush may not blend as smoothly and could look patchy or separated on your skin.
What's the difference between cream blush and powder blush for a natural look?
Cream blush blends more seamlessly into skin and creates a natural, dewy finish that looks like a true flush. Powder blush can appear more matte and defined, which some find less natural-looking. Cream blush works especially well on dry or mature skin because it doesn't emphasize texture, while powder blush suits oily skin better. For the most natural appearance, cream blush is generally the better choice, especially if you want that 'from-within' glow.